Creating a Classroom & Adding Students

Purpose
To provide school administrators with clear, step-by-step instructions on how to create new classrooms within the platform and assign students to those classrooms.
Scope
This procedure applies to all School Administrators responsible for managing classrooms and student enrollment within the platform.
Responsibility
School Administrator (or any user with classroom creation permissions).
Procedure
1. Access the Classroom Management Area
-
Log in to the platform using your Provider account.
-
From the left-side navigation menu, click on “Classrooms”.
-
This section is dedicated to creating and managing all classrooms for the school.
-
2. Create a New Classroom
-
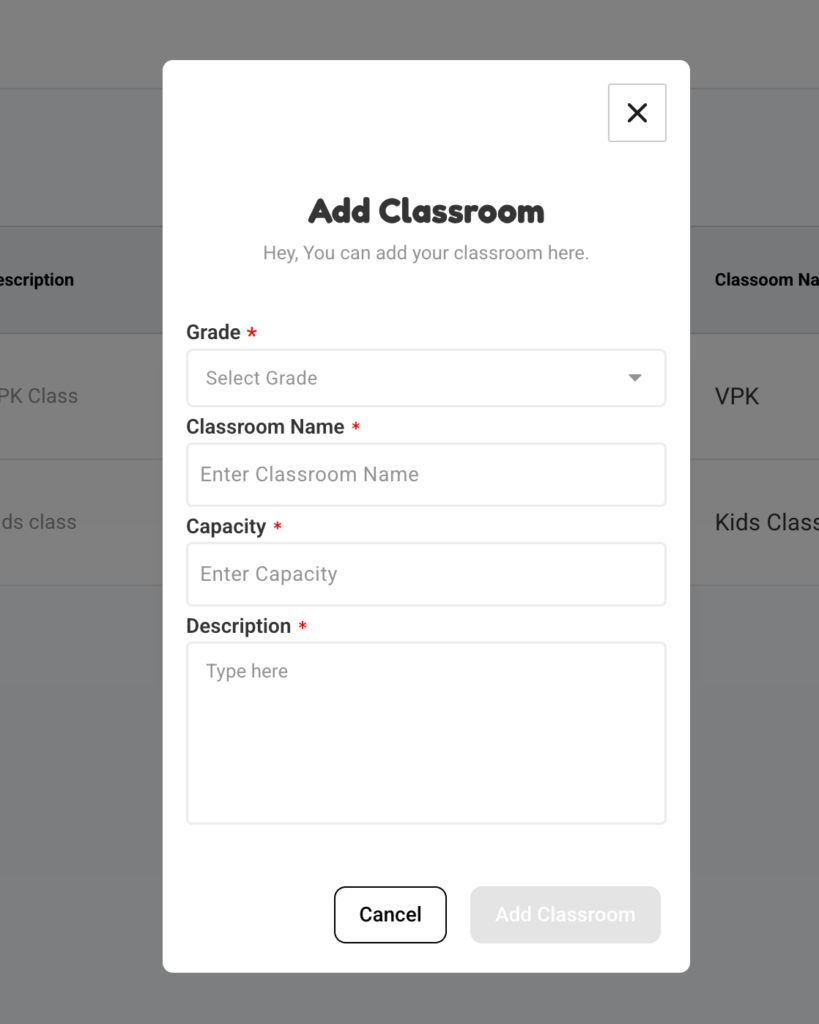
Click the “Create Classroom” button (or “+ Add Classroom” depending on your platform layout).
-
Enter the required classroom information:
-
Grade
-
Classroom Name (Example: “VPK A” or “Toddler Room 1”)
-
Capacity (optional field based on your system)
-
Brief description
-
-
Review the information for accuracy.
-
Click “Save” to create the classroom.
Note: Once saved, the classroom will now appear in the Classrooms list and will be available when assigning students.

STEP 2: Assign Students to the Classroom
After creating classrooms, the administrator assigns students from the Users section.
Steps:
-
Navigate to the left-side menu and click on the “Users” tab.
-
At the top of the Users section, select the “Classroom” tab
(this tab is located next to “Teachers”). -
Click on the Classroom you want to view.
-
A list of all students assigned to that classroom will appear.
-
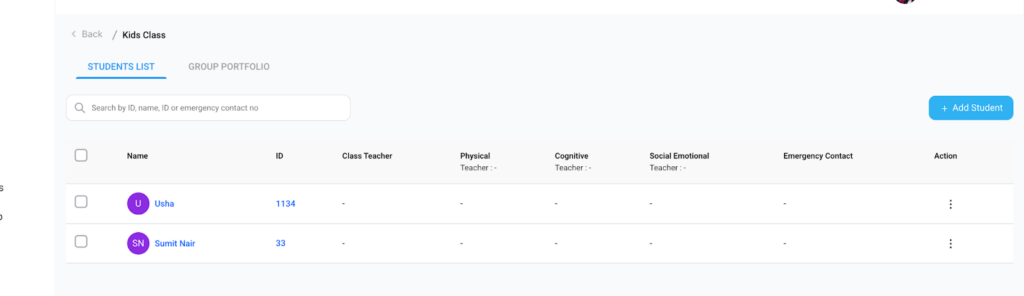
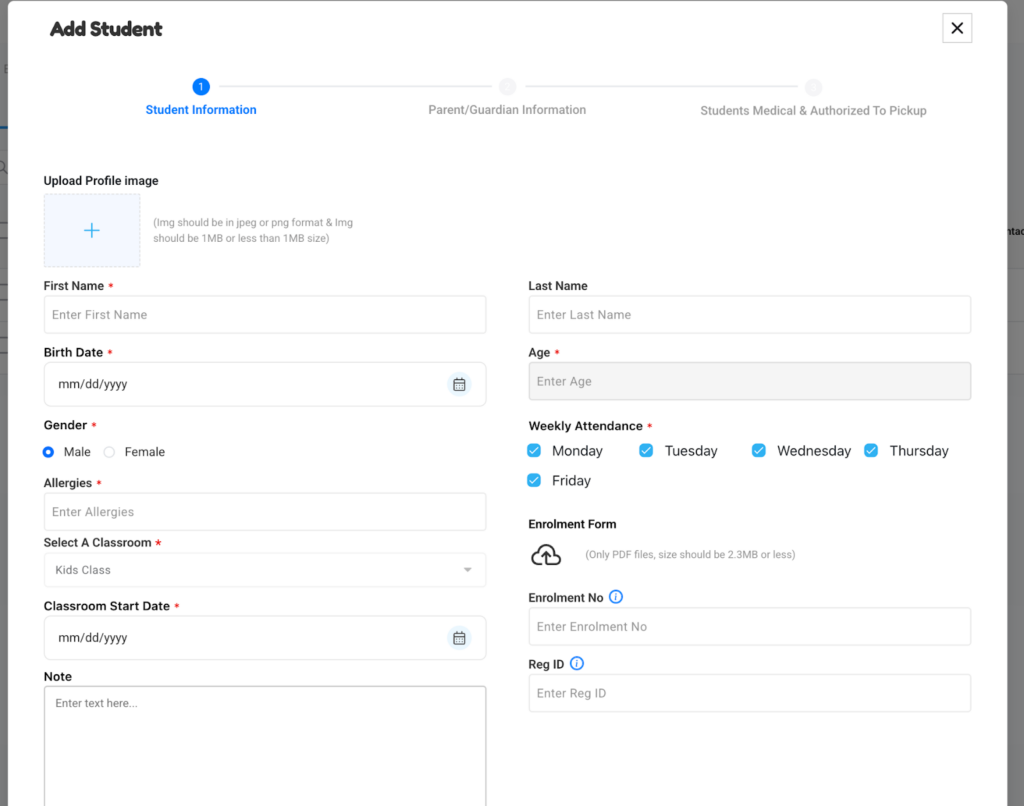
To add a new student click on add student and complete the requested information
Steps to Add a New Student to a Classroom
-
While inside the Classroom tab, click on “Add Student.”
-
Complete all required fields in the student information form, including:
-
Student Name
-
Date of Birth
-
Classroom
-
Parent/Guardian contact information (if applicable)
-
Any additional required fields
-
-
Click “Save” to add the student to the classroom.