
How to Move a Student to Another Classroom
Purpose
This SOP outlines the standardized process for reassigning a student from one classroom to another within the system. Following these steps ensures accurate enrollment records, classroom rosters, and reporting.
Step-by-Step Instructions
Step 1: Navigate to the Users Tab
- From the main menu, click Users.
Step 2: Open the Classrooms Tab
- Within the Users section, select the Classrooms tab.
(This tab is located next to the “Teachers” tab.) - A list of all classrooms in the school will appear.
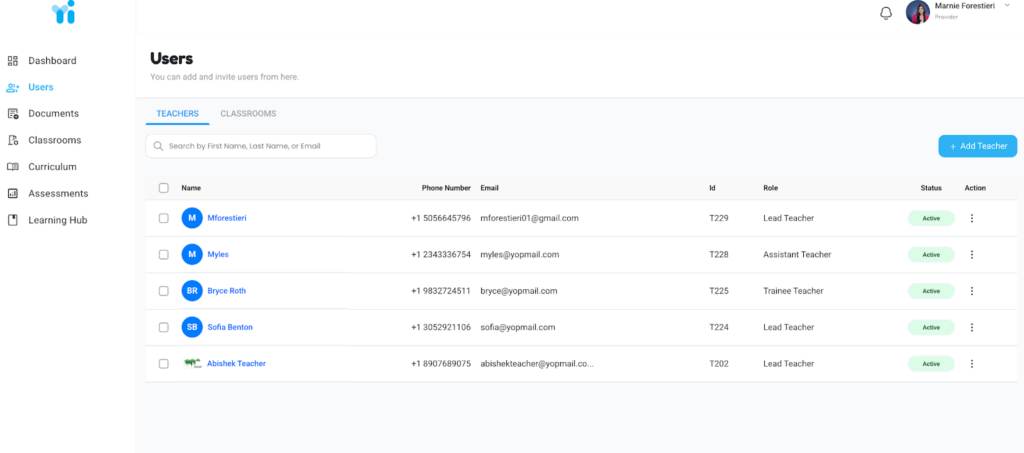
Step 3: Select the Student & Open the Student Record
- Locate the student you want to move.
- Click the three dots (⋯) on the right side of the student’s name.
- Select Edit from the dropdown menu.
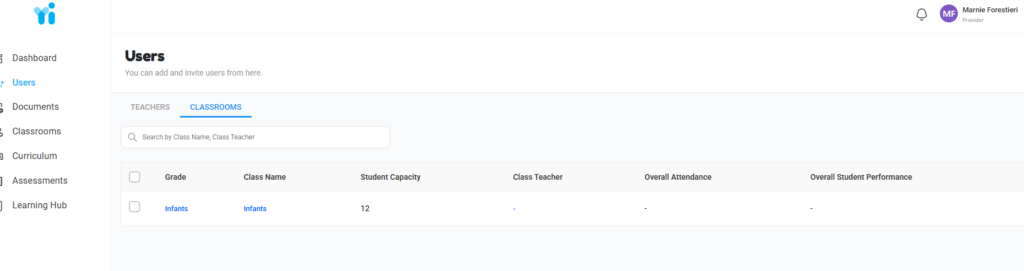
Step 3: Select the Student & Open the Student Record
-
Locate the student you want to move.
-
Click the three dots (⋯) on the right side of the student’s name.
-
Select Edit from the dropdown menu.
Step 4: Reassign the Student to a New Classroom
-
Inside the student’s profile, locate the Classroom Assignment field.
-
Select the new classroom from the dropdown list.
-
Click Save to apply the changes.
Step 4: Open the Student Record
-
Locate the student you want to move.
-
Click the Action button next to the student’s name.
-
Select Edit.
Step 5: Reassign the Student to a New Classroom
-
Inside the student’s profile, locate the Classroom Assignment field.
-
Select the new classroom from the dropdown menu.
-
Click Save to apply the changes.
Important Notes
-
Changes take effect immediately after saving.
-
Always confirm the student appears on the new classroom roster.
-
Ensure classroom capacity and age-group compliance before reassignment.
Responsibility
-
Directors and Administrators are responsible for ensuring student classroom assignments are accurate and updated promptly.